
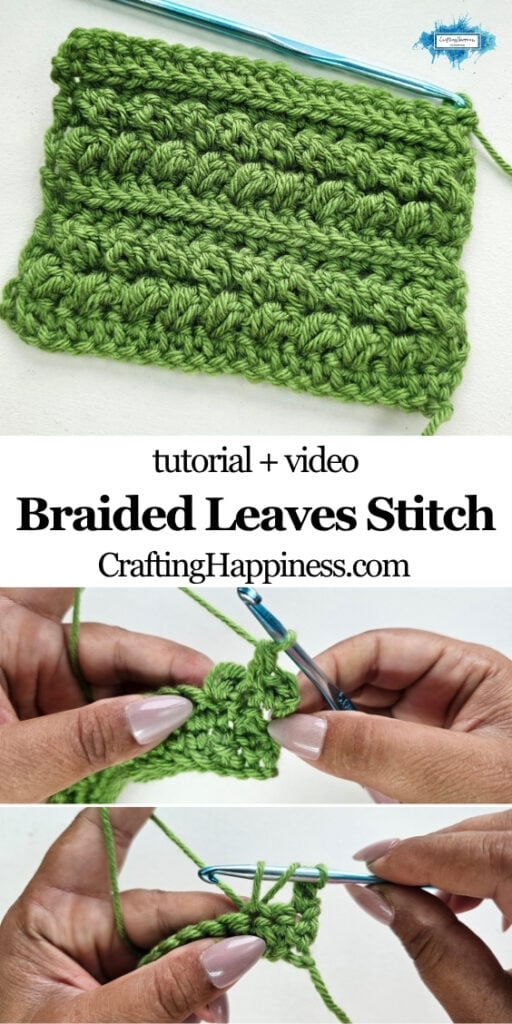
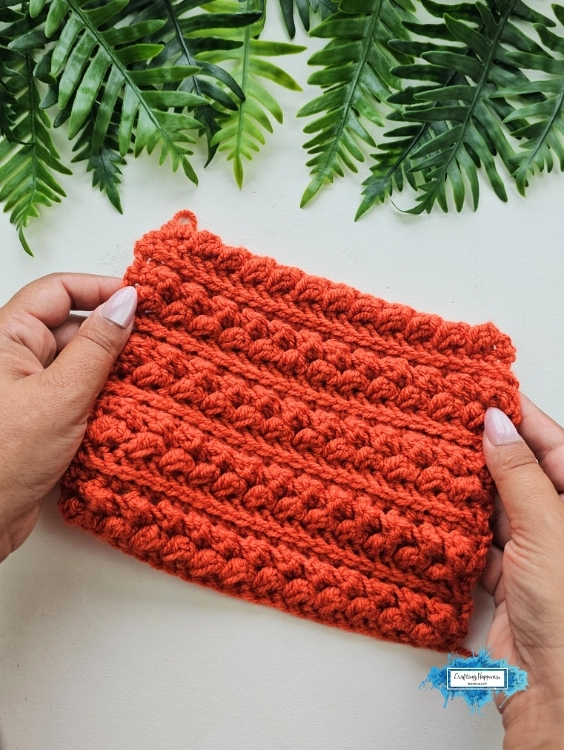
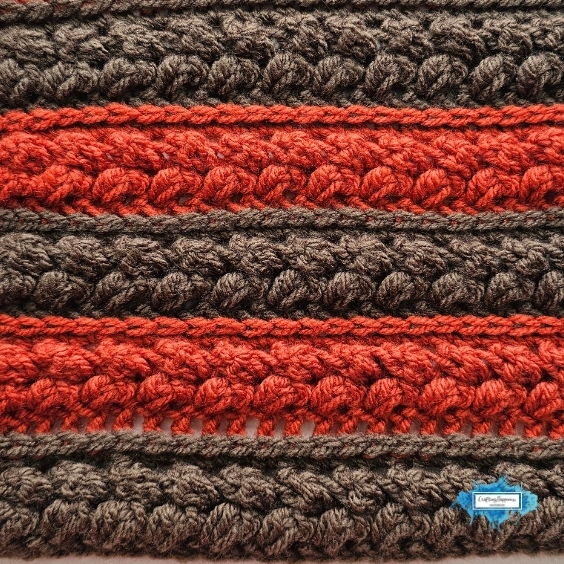
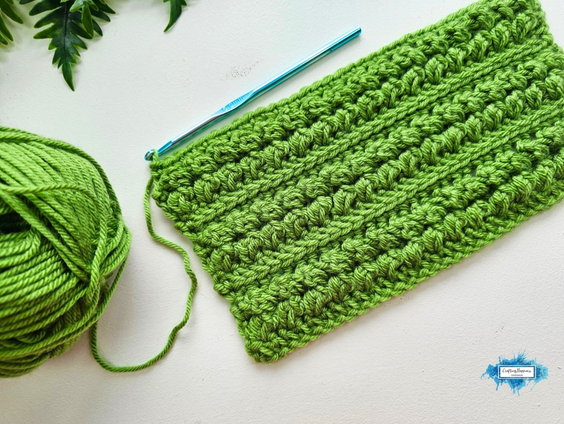
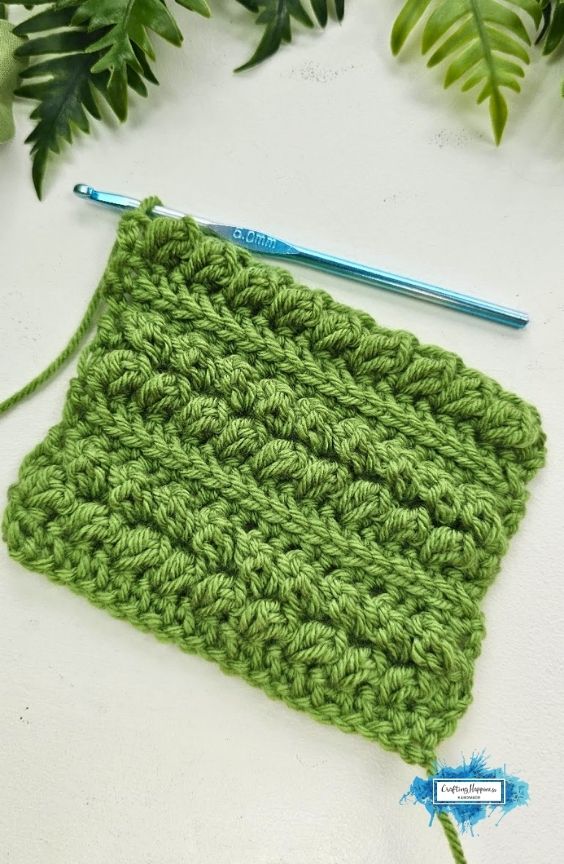
The Braided Leaves Stitch is an easy braided leaves crochet stitch tutorial that creates dense rows of intertwining, raised leaf shapes across your fabric. I designed this original textured crochet stitch to combine the solid coverage of linked stitches with dimensional botanical details that look like braided foliage.
By working modified clusters behind and in front of extended stitches, each leafy stem interlocks smoothly with the next row. This crochet leaf stitch creates a thick, hole-free fabric that stays warm and keeps its shape.
*This post may contain affiliate links to support the cost of this blog. At no cost to you, I may make a small commission if you purchase through these links. Read our Privacy Policy HERE
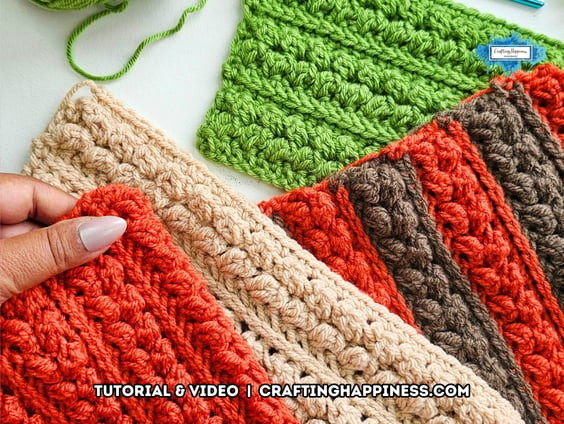
Project Overview
This tutorial shows you how to work a solid, thick fabric with raised leaf details using modified linked stitches and alternating cross placements.
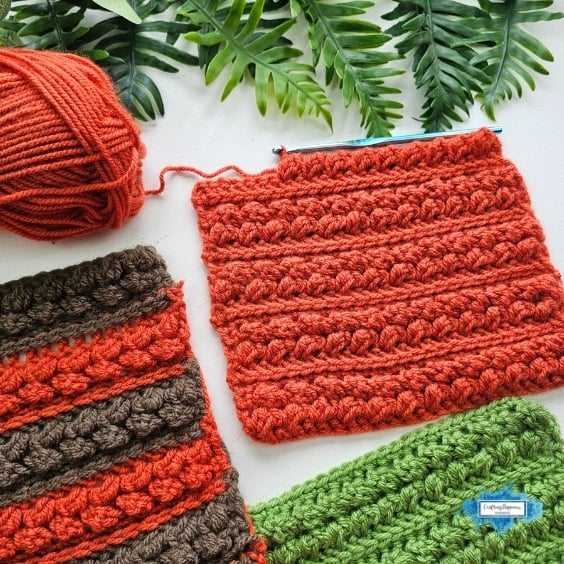
BEST FOR: Blankets, warm scarves, structured tote bags, winter sweaters, and cushion covers
PATTERN MULTIPLE: 2x+1 (uneven number of chains)
ROW/ROUND REPEAT: 4 row repeat
COLOR CHANGE: after 4 rows
PATTERN TYPE: Textured, Solid, One-sided
YARN USAGE: Heavy (Thick/Dense)
VIDEO TUTORIAL: https://www.youtube.com/watch?v=gnp_lRgYDTo&list=PLKCBBlbOlqZhgm9g5tPe4v2mT2C8MReb0&index=80&pp=iAQBsAgC
How I turned a simple leaf into a braided branch
This pattern came to life while I was making swatches for my Sedum Stitch.
As I was working back and forth trying to make the leaves face the right way, I started wondering what would happen if I made the leaves look braided instead.
A few tries later, and after quite a bit of frogging, I finally came up with a way to reverse the angle on the leaf clusters. That small adjustment allowed the alternating rows to interlock cleanly across the fabric.
The finished texture looks just like a continuous braided vine. I am so glad I kept experimenting, and now I get to show you exactly how to make it.
If you found this post helpful, please like and share. Follow me on Pinterest for more crochet inspiration. Follow us on Instagram, Tiktok and Facebook @CraftingHappinessCrochet.
- Project Overview
- How I turned a simple leaf into a braided branch
- Why you will want to make this stitch
- What can you make with the Braided Leaves Stitch?
- Watch the step by step video lesson
- Yarn and hook choices for my sample
- Color swatches for Braided Leaves Stitch
- Crochet Abbreviations
- Special Stitches
- How to crochet the Braided Leaves Stitch
- Common questions about the Braided Leaves Stitch
- Thank you for crocheting with me
- Looking for similar stitches to Braided Leaves Stitch?
- Copyright
Why you will want to make this stitch
- Solid fabric: The modified linked double crochet stitches eliminate gaps and holes between posts to give you solid coverage.
- Beautiful braided relief: The modified leaf clusters cross over each other smoothly to build a realistic braided plant motif.
- Clean edges: Stacked single crochet stitches at the start of rows keep your borders straight and tidy without gaps.
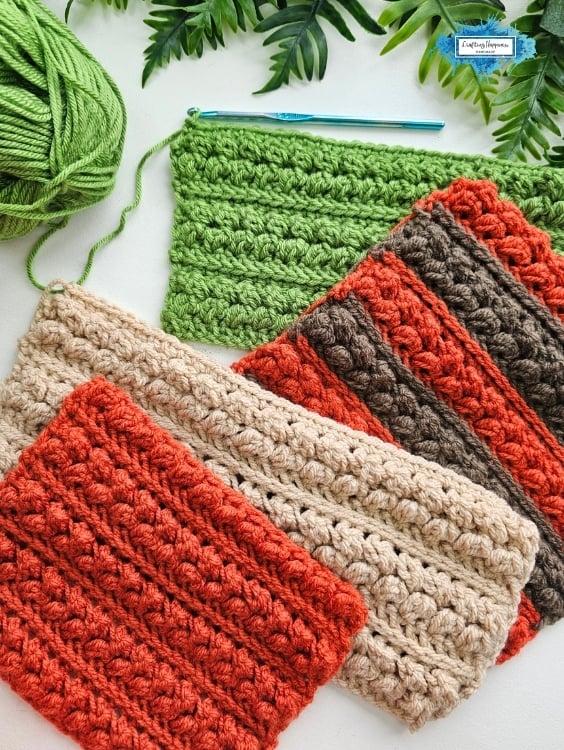
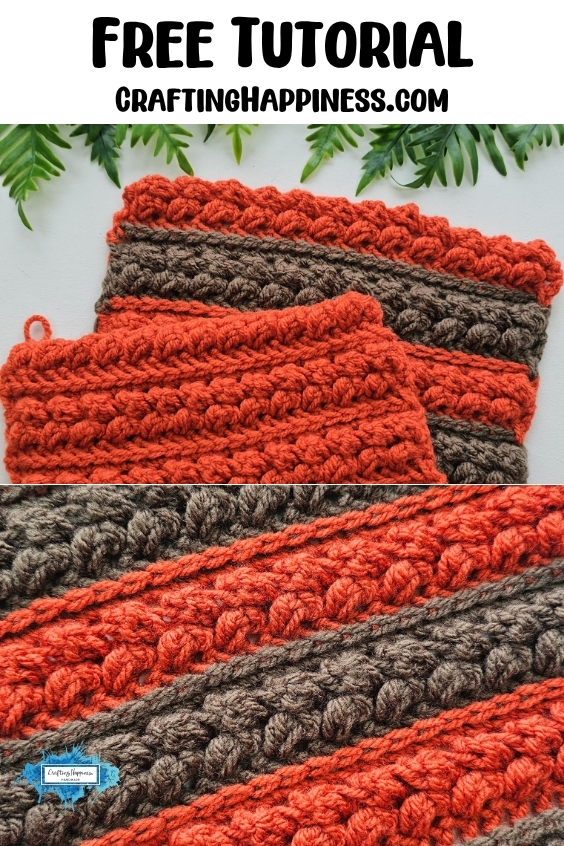
- Great color options: The stitch definition looks striking in a single solid color, or you can switch colors every two to four rows to highlight the braided sections.
What can you make with the Braided Leaves Stitch?
This crochet leaf stitch with video tutorial makes a dense, sturdy fabric that is well suited for heavy winter projects.
You can use it to make warm throw blankets, thick baby blankets, and solid cushion covers that hold their shape.
It is also great for wearable winter accessories like thick cowls, long scarves, and textured cardigans.
Because the stitch has no holes, it works especially well for making sturdy tote bags that will not stretch out or let small items slip through.
Watch the step by step video lesson
I made a complete crochet leaf stitch with video tutorial to show you every single stitch placement and technique.
You can follow along on my YouTube channel to see exactly how to place your hook for the modified linked stitches and front post work.
How To Crochet My Braided Leaves Stitch
Yarn and hook choices for my sample
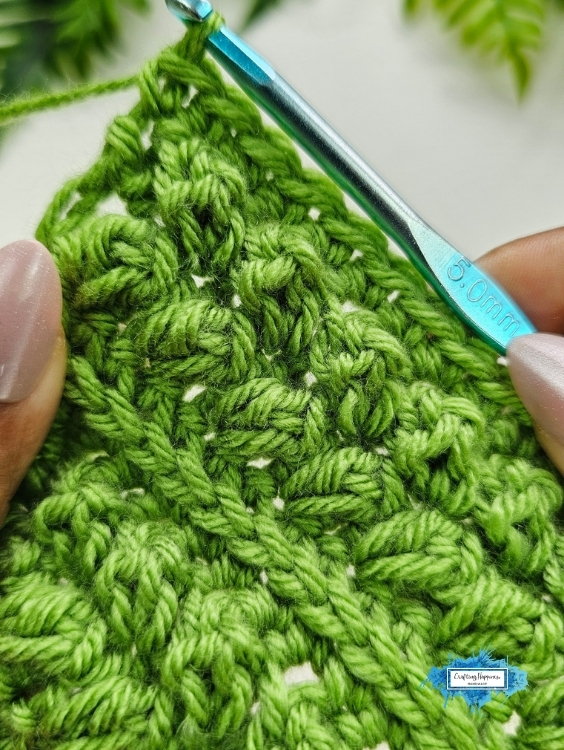
For this sample, I used an Aran weight yarn paired with a 5mm crochet hook to give the raised leaves good definition.
You will also need a pair of scissors and a tapestry needle to weave in your ends when you finish.
You can use any yarn weight you have in your collection for this pattern, from lightweight acrylic to thick wool. Just pick the crochet hook size recommended on your yarn label so your fabric has the right tension.
Color swatches for Braided Leaves Stitch
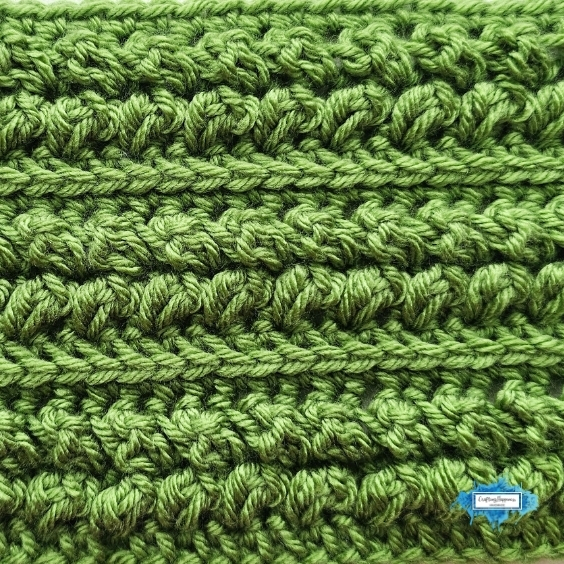
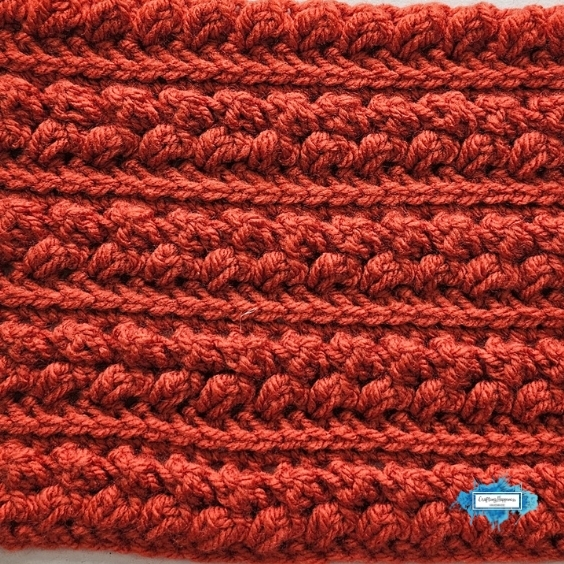
You can work this pattern in a single solid shade to keep the focus on the textured leaf relief, or change yarn colors to create clear bands.
For defined stripes, change your color every four rows at the start of the repeat, or change every two rows to give each set of leaves a contrasting background.
Crochet Abbreviations
Written in US terms using Craft Yarn Council abbreviations.
- st(s) – stitch(es)
- ch(s) – chain(s)
- yo – yarn over
- sc – single crochet
- sk – skip
- Mdc2tog – Modified double crochet 2 together
- Mldc – Modified linked double crochet
- Esc – Extended single crochet
- STsc – Stacked single crochet
- FP Mldc – Modified linked double crochet in the front post of stitches
Special Stitches
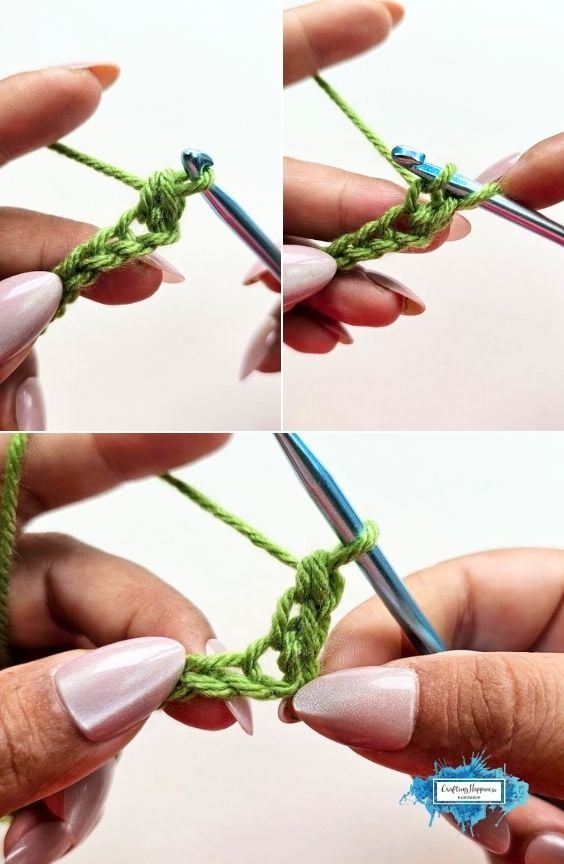
Stacked single crochet (STsc) – This stitch is made out of 2sc one on top of the other. The result is a taller stitch that looks like a double crochet.
Make 1sc as usual, insert hook behind the left loop of the sc , yo and pull up a loop, yo and pull through the 2 loops
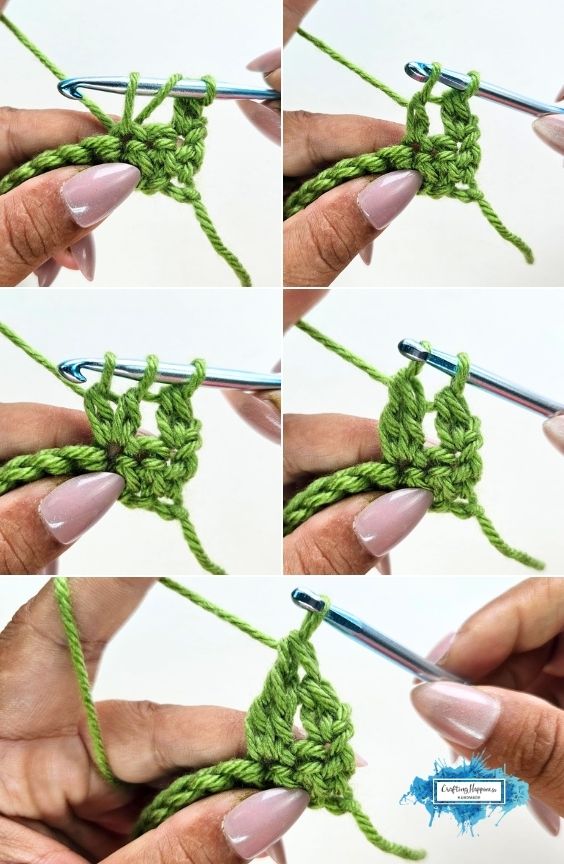
Modified Double Crochet 2 Together (Mdc2tog) – this is a regular dc2tog modified to have a longer shape that looks like a leaf.
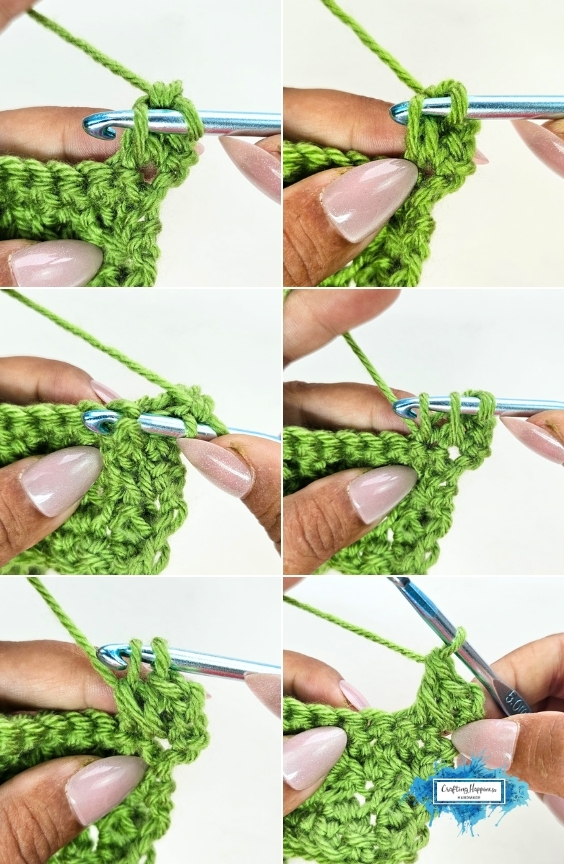
*Insert hook into the stitch, yo and pull up a loop, yo and pull through the first 2 loops on the hook. Leave the incomplete dc stitch on the hook* x 2 (you will have 3 loops on your hook), yo and pull through first 2 loops (2 loops on your hook), yo and pull through the 2 remaining loops on your hook.
Modified linked double crochet (Mldc) – I modified the linked double crochet to remove the horizontal lines that made it look like 2 rows of sc, but still keep the connection between the dc posts and make the fabric solid with no holes.
Insert hook through the left loop of the previous stitch (this replaces the yarn over portion of the regular dc stitch), yo and pull up a loop, you will have 3 loops on your hook. Yo and pull theough 2, yo and pull through 2.
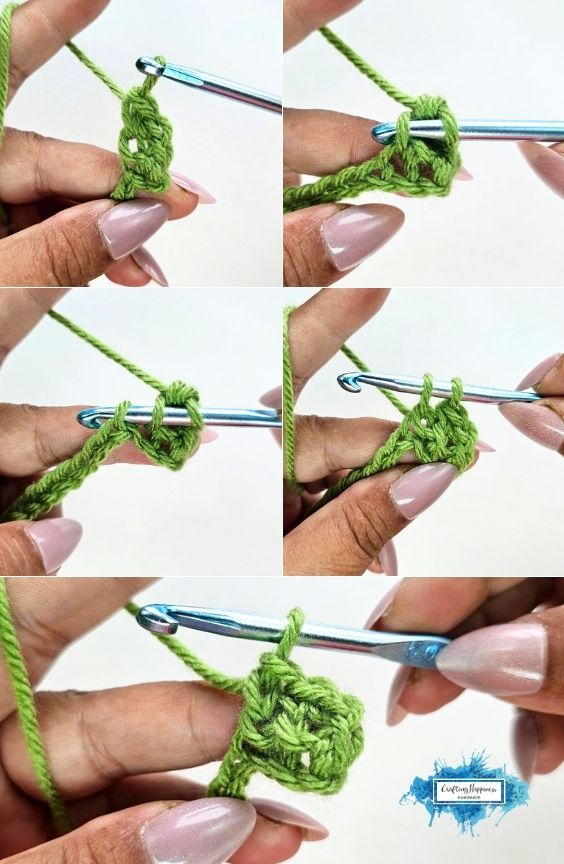
Extended single crochet (esc) – insert hook in the stitch, yo and pull up a loop, yo and pull through only the first loop on your hook, yo and pull through the 2 remaining loops on your hook
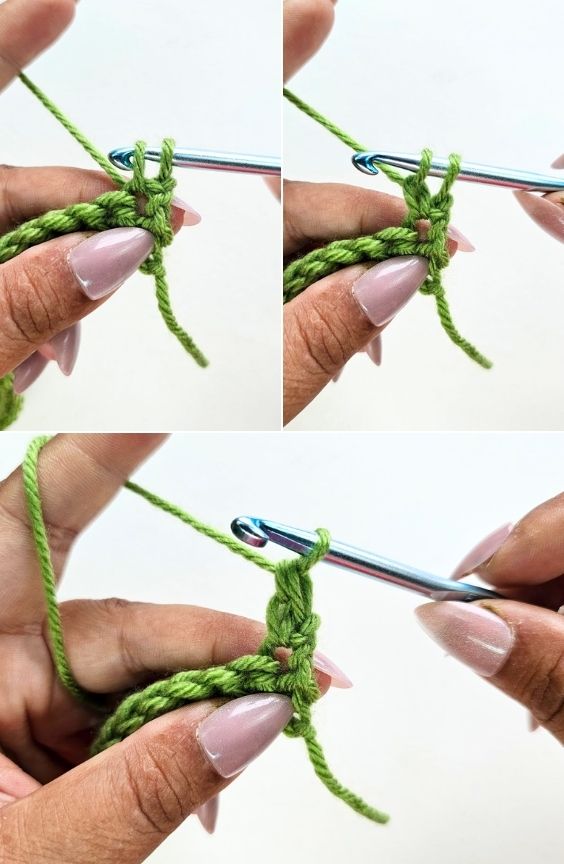
Modified Linked Double Crochet in the Front Post of Stitches (FP Mldc) – The front post modified linked dc is made the same way as the regular front post hdc, except, instead of yarning over, you insert the hook in the left loop of the stitch.
Insert hook in left loop of the stitch then insert hook, from front to back, around the post of the following stitch, yarn over and pull up a loop (you will have 3 loops on your hook), yarn over and pull through 2 loops (2 loops left on the hook), yarn over and pull through the remaining 2 loops on the hook.
How to crochet the Braided Leaves Stitch
Starting chain: Chain 21
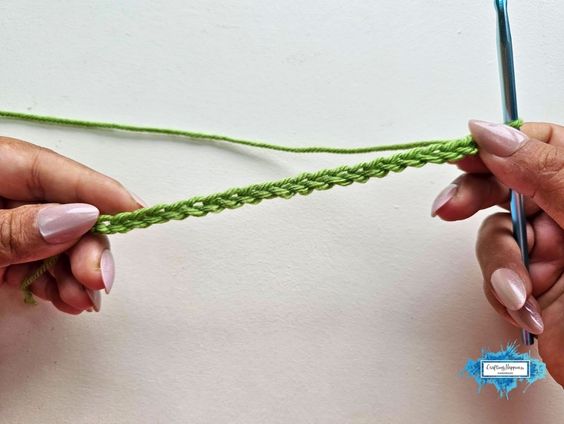
Row 1: STsc, Mldc in each remaining chain, ch1, turn =21
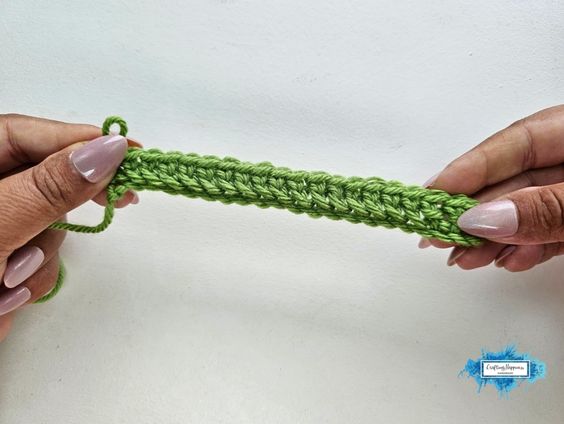
Row 2: esc, *sk1, Mdc2tog, esc in the skipped stitch (made at the back of the Mdc2tog)*, repeat ** until you have 1 st left, esc in the last st, ch1, turn
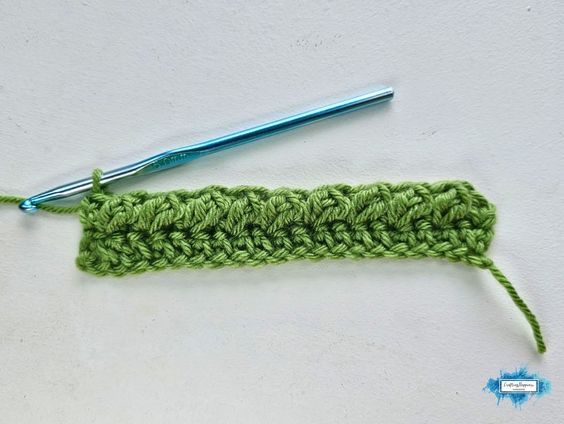
Row 3: esc, *sk1, Mdc2tog, esc in the skipped stitch (made at the front of the Mdc2tog)*, repeat ** until you have 1 st left, esc in the last st, ch1, turn
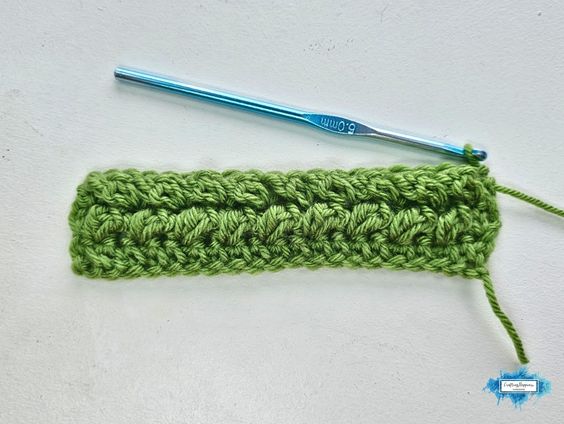
Row 4: sc in each stitch , ch1, turn
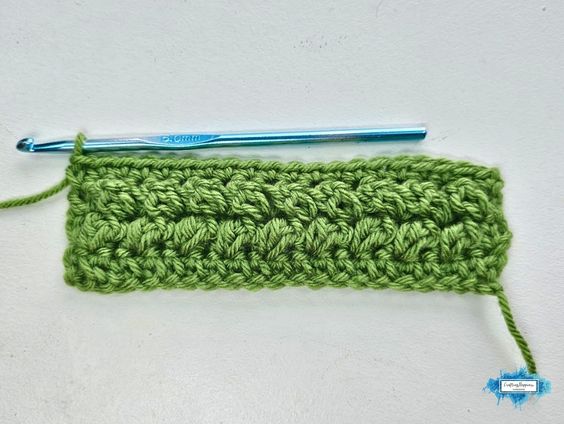
Row 5: STsc, FP Mldc until you have 1st left, Mldc in the last st, ch1, turn.
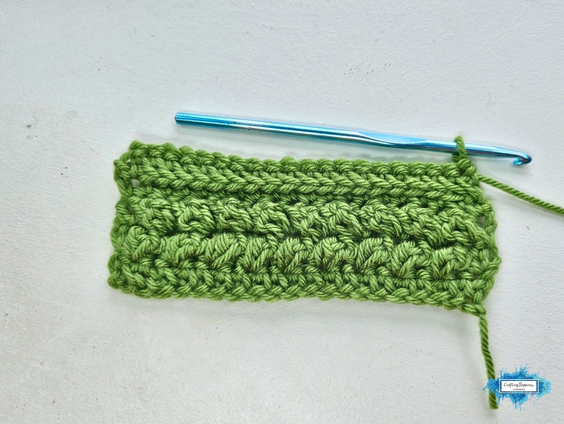
Repeat Rows 2 -5 until you have the desired length to your work.
If you found this post helpful, please like and share. Follow me on Pinterest for more crochet inspiration. Follow us on Instagram, Tiktok and Facebook @CraftingHappinessCrochet.
Common questions about the Braided Leaves Stitch
Is the Braided Leaves Stitch reversible?
No, the Braided Leaves Stitch is one-sided. The raised braided leaf texture appears across the front side of your work, while the reverse side stays flat, solid, and smooth.
Does the Braided Leaves Stitch use a lot of yarn?
Yes, the Braided Leaves Stitch uses a heavy amount of yarn because it creates a thick, solid fabric using modified linked double crochet and textured clusters. If you are planning a large blanket, make sure to get extra yarn compared to basic flat stitches.
Can beginners crochet the Braided Leaves Stitch?
The Braided Leaves Stitch is best suited for confident beginners and intermediate crocheters who know basic stitches and want to try special hook placements. Following along with my step-by-step video makes learning the modified leaf cluster techniques straightforward.
Thank you for crocheting with me
Thank you so much for choosing my tutorial and spending your making time with me today. I hope you enjoy watching these braided leaves stitch take shape across your rows. Happy Crocheting.
Looking for similar stitches to Braided Leaves Stitch?
- How To Crochet The Braided Leaves Stitch (With Video Tutorial)
- How to Crochet the Sedum Stitch (Easy Video & Photo Tutorial)
- How to Crochet a Back Loop Single Crochet Rib Border

- Classic Mesh Stitch – The Simple Stitch Pattern That Makes Yarn Go Twice As Far

- Crochet Strawberry Stitch Tutorial & Video

- How To Crochet A Half Bobble Stitch For Blankets
Copyright
© 2026 Crafting Happiness. All rights reserved.
The photographs in this tutorial are subject to copyright and are the property of Crafting Happiness. Don’t use them to advertise your own creations. You may use photos from this post only if you directly link back to this tutorial.
