How To Crochet An Oval: Tutorial & Video


Crocheting An Oval In Any Size You Like
Today, I will show you how to crochet an oval and make it as big as you like.
Use this pattern to make anything from small oval appliques to large rugs or tablecloths. The repeat section after the 4th round will show you how.
Please note that this post contains affiliate links, I will earn a small percentage should you choose to purchase something, but it will be at no cost to you. You can see my full disclosure policy here. Thank you for supporting my work and this blog.
Video Tutorial
Subscribe to Crafting Happiness YouTube Channel to save this video for later.
How To Crochet An Oval-Shaped Motif
Pattern Notes
Pattern Characteristics
- solid
- crochet motif
- oval
- adjustable
- flat
Pattern Repeat
- 1-row repeat
Supplies Used
- Marriner Yarns Aran in blue
- Click here for YARN ALTERNATIVES
- 5mm crochet hook
Abbreviations
Pattern written in US terms using Craft Yarn Council abbreviations.
- st(s) – stitch(es)
- ch(s) – chain(s)
- yo- yarn over
- sc – single crochet
Special Stitches
No special stitches were used in this pattern
Pattern Instructions
- work in the round, without turning or closing the round
- stitches contained within ** are the repeat section for that row
- this pattern contains the first 4 rows, but you can make it as big as you like by continuing to increase the stitches in the same manner as you would with a circle.
- TIP: make this oval longer by increasing the number of chains you make at the beginning
Starting Chain: make a slip knot and ch5

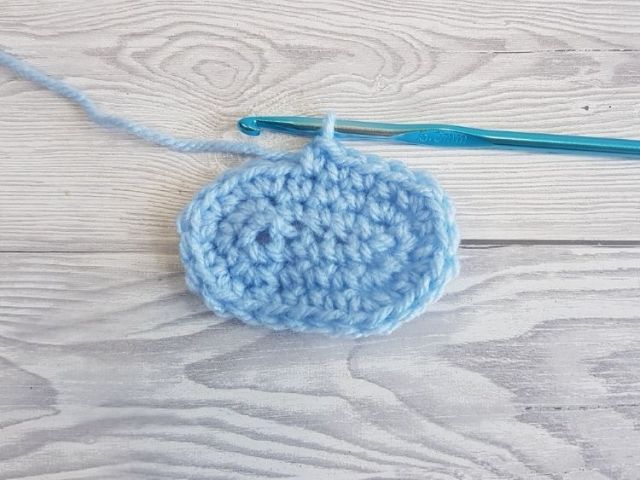
Row 1: 3sc in 2nd ch from hook, sc in next 2chs, 3sc in the last ch, turn your work around (the stitches you just made are at the bottom), we will work on the other side of the chain, sc in next 2ch = 10

Row 2: *2sc in next 3sts, sc in next 2sts* x 2 = 16

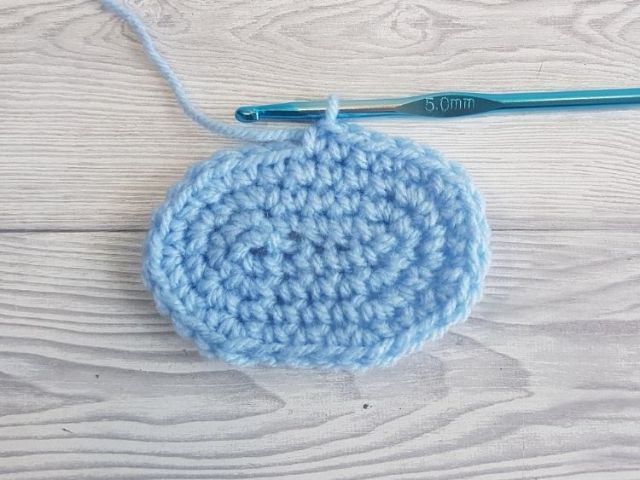
Row 3: *(2sc in next st, sc in next st) x 3, sc in next 2sts* x 2 = 22
Row 4: *(2sc in next st, sc in next 2sts) x 3, sc in next 2sts* x 2
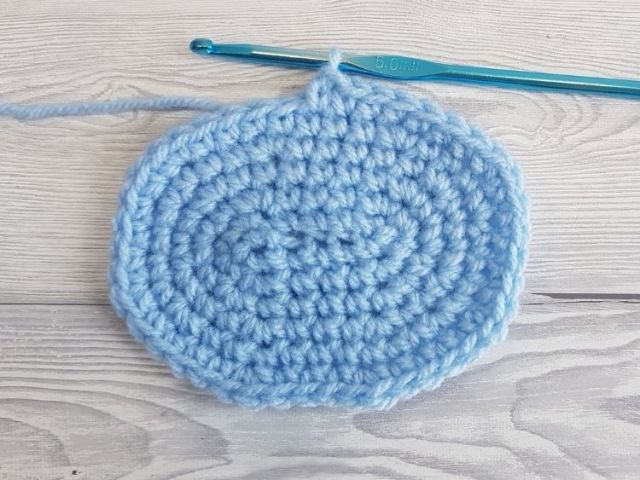
Repeat row 4 increasing the number of single crochet between increases (the 2sc in the same stitch you make on either side of the oval) until you have the size you want.
Download The PDF Version
If you want to download the printable PDF version of this tutorial, you can do so when you join my Patreon.
Pattern Swatch


And this is how you crochet an oval in any size you like. If you found this tutorial helpful, please share and Pin it! Follow me on Pinterest here.
Don’t forget to tag me @craftinghappinesscrochet with your creations, I would love to see them and share them with my fellow crocheters.

Looking For Similar Crochet Patterns?
- Turn Crochet Puff Flower Into Circle Motifs Using Double Crochet Stitches

- How To Turn Crochet Puff Flowers Into Round Motifs: Free Pattern & Video

- Crochet Puff Flower Granny Square Free Pattern With Video Tutorial

- Free Crochet Puff Flower Solid Square Pattern & Video Tutorial

- Free Crochet Skull Granny Square Crochet Pattern

- Daisy Granny Square

- Solid Granny Square

- How To Crochet A Quarter Granny Square

COPYRIGHT:
The photographs in this tutorial are subject to copyright and are the property of Crafting Happiness, don’t use them to advertise your own creations. You may use photos from this post only if you directly link back to this tutorial.
Happy Crocheting!
