Crochet Waffle Stitch Tutorial

The waffle stitch has so much texture and it is so easy to make, anyone can learn how to crochet it.

Below you will find a detailed illustrated tutorial with step-by-step instruction, a basic diagram, and a video for those who learn better from watching how the stitch is crocheted.
The Waffle Stitch – Pattern Description
The waffle stitch pattern is beginner friendly and works up fast using only two stitches: the front post double crochet and the double crochet stitches.
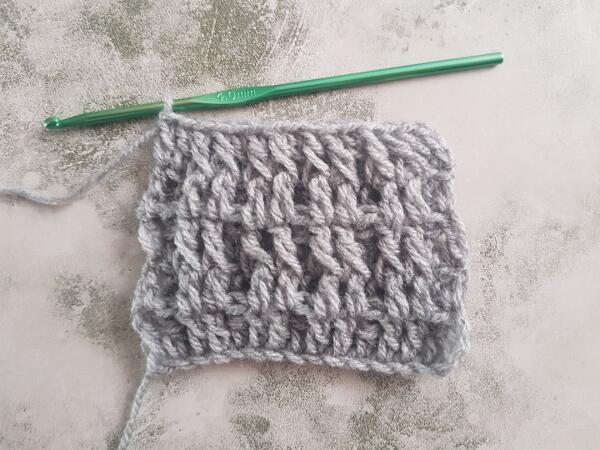
The pattern has a textured side that looks like waffles and a flat side and can be used in a variety of projects, from blankets and afghans to jumpers and shawls.
Please note that this post contains affiliate links, I will earn a small percentage should you choose to purchase something, but it will be at no cost to you. You can see my full disclosure policy here. Thank you for supporting my work and this blog.

Video Tutorial
Subscribe to Crafting Happiness YouTube Channel to save this video for later.
How To Crochet The Waffle Stitch
Pattern Notes
Pattern Characteristics
- solid
- textured
Pattern Repeat
- Multiples of 3ch
- 2-row repeat
Supplies Used
- Marriner Yarns DK (light worsted) yarn in grey
- Click here for YARN ALTERNATIVES
- 4mm crochet hook
Unfortunately MarrinerYarns ships only in the UK, so for my international customers, I can recommend a similar yarn, Red Heart Yarn, which comes in a multitude of colors and weights, just as affordable and easy to work with as Marriner Yarns.
- I get most of my crochet supplies from Amazon, it’s fast and easy and I find everything I need in one place.
I also invested in Amazon Prime Membership which makes most of the shipping free and deliveries super fast.
Abbreviations
Pattern written in US terms using Craft Yarn Council abbreviations.
- yo – yarn over
- ch – chain
- fpdc – front post double crochet
- dc – double crochet
- dc1 – first double crochet in the row
Special Stitches
First Double Crochet In The Row (dc1) – sc in the very first stitch, ch2

Crocheting the first double crochet in the row with this method (as opposed to the usual ch3 method) will prevent the gap that usually occurs between the first and second posts.
Pattern Instructions
For this tutorial, my starting chain was 18 long.
Row 1: ch18

Row 2: dc in the 5th chain and in each chain across, turn

Row 3: dc1, fpdc, *2dc, fpdc*, repeat across, dc, turn

Row 4: dc1, dc, *2fpdc, dc*, repeat across, dc, turn

From this point on, repeat rows 3 and 4 until the required length is achieved.
Here are two more rows, you will have an idea of how the waffle texture is formed.
Row 5: dc1, fpdc, *2dc, fpdc*, repeat across, dc, turn

Row 6: dc1, dc, *2fpdc, dc*, repeat across, dc, turn
The waffle stitch texture starts to form from this point on.

Pattern Swatch

Diagram
I have included a basic diagram to help you understand how this pattern is constructed

Download The PDF Version
If you want to download the printable PDF version of this tutorial, you can do so when you join my Patreon.
And this is how you crochet the Waffle Stitch. If you found this tutorial helpful, please share and Pin it! Follow me on Pinterest here.
Don’t forget to tag me @craftinghappinesscrochet with your creations, I would love to see them and share them with my fellow crocheters.

Looking For Similar Crochet Tutorials?
- How To Crochet The Classic Mesh Stitch

- Crochet Strawberry Stitch Tutorial & Video

- How To Crochet A Half Bobble Stitch For Blankets

- Crochet Linked Flowers Stitch: Step-by-Step Tutorial for Beginners

- How To Crochet The Cat Stitch Step By Step For Beginners

- How To Crochet The Feather Stitch (In Single And Multiple Colors)

- Crochet Bamboo Leaf Stitch Tutorial With Video

- Knotted Half Double Crochet

COPYRIGHT:
The photographs on this tutorial are subject to copyright and are the property of Crafting Happiness, don’t use them to advertise your own creations. You may use photos from this post only if you directly link back to this tutorial.
Happy Crocheting!


